Launch Watermark Plus and a start panel will appear as below.
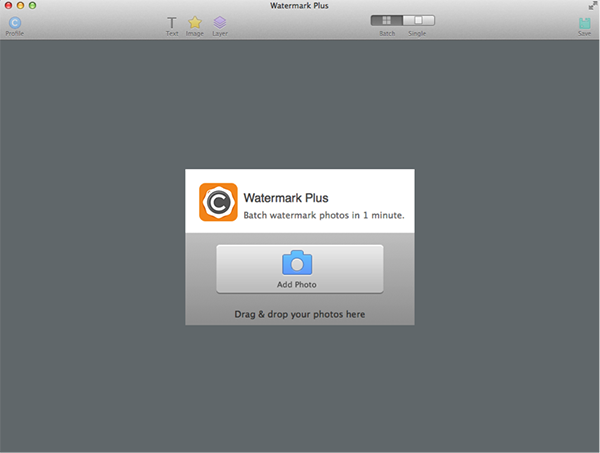
Click Add Photo to import the photos you need to watermark. You can also drag and drop your photos to Watermark Plus directly.
Click Profile button  on the top of window to open the profile window.
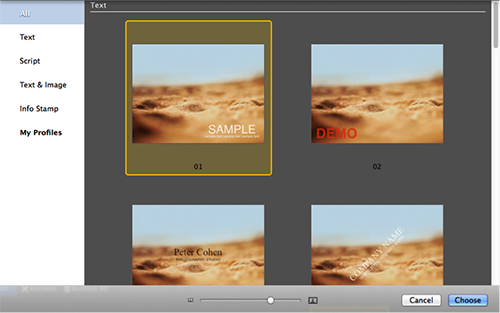
Choose any one of the 17 built-in watermark profiles for directly using.
Click Image toolbar button  on the top of window to add image watermark for your photos.
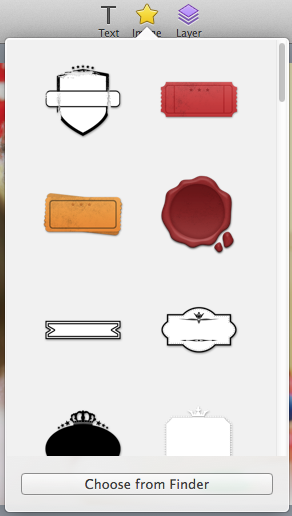
You can also click Choose from Finder to use your own image as watermark to fit your needs.
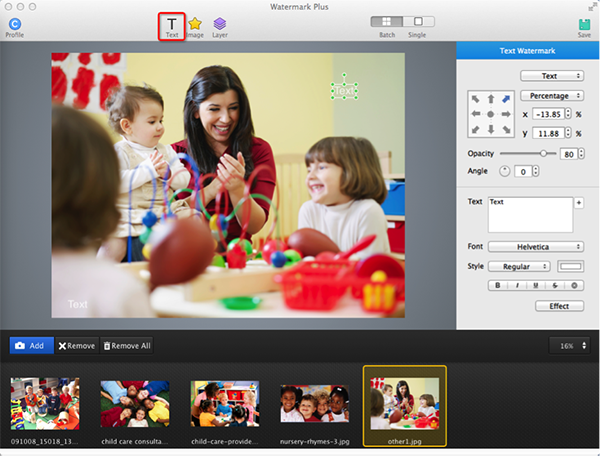
Add Plain TextClick Text toolbar button  on the top of window to add text watermark for your photos.
Add Scrip TextClick Script in the combo box to set a text script watermark for your photos as needed. Script adjustment options are also available.
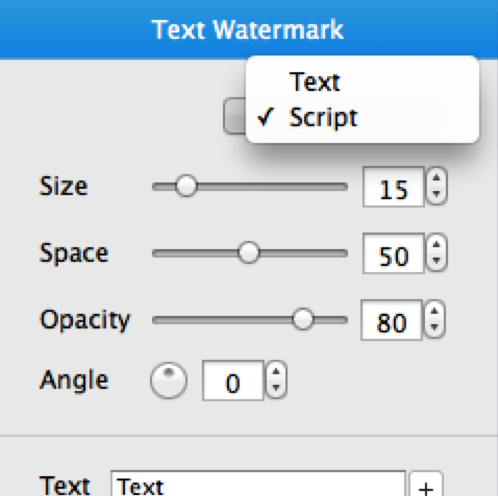
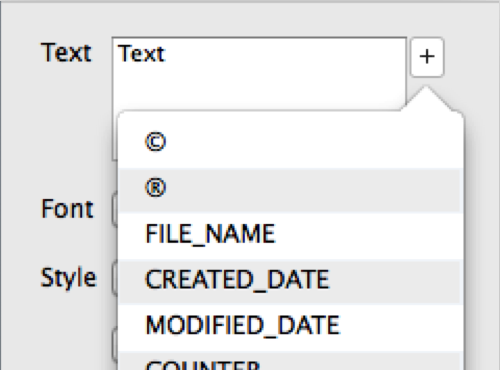
Add Info StampClick  button near the Text input box to add info stamp for text, such as Created Date, EXIF info, etc.
You are free to adjust your text/image watermark on the right panel.
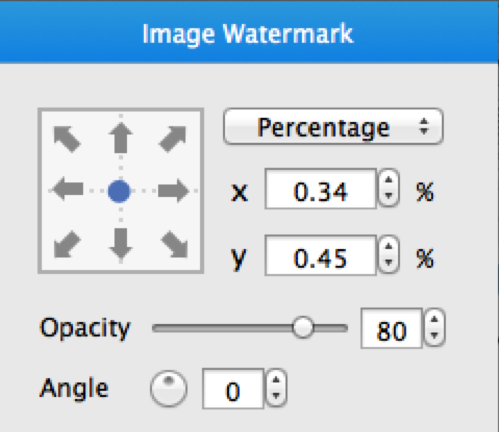
Change Position of Your WatermarkClick arrow keys on the relative controller  to quickly place your watermark.
Directly input the properties to adjust its offset by Percentage or Pixel.
Or simply drag and move the selected watermark to the position you like.
Adjust the Opacity of WatermarkGrab and drag the Opacity slider below relative controller to adjust opacity of watermark.

Rotate WatermarkSelect a watermark and then the green-framed manipulation handles appear:
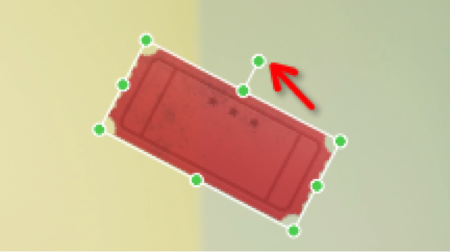
Grab the green handle on the top and move it around to rotate the watermark.
Or use Angle control 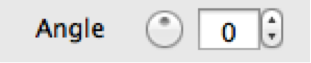 to rotate watermark in 360 degrees.
Resize WatermarkSelect a watermark and then the green-framed manipulation handles appear:
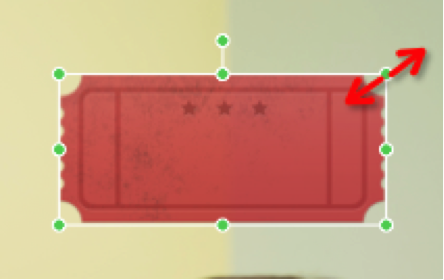
Grab and drag the green manipulation handles to resize the watermark at will.
Customize the TextSelect your text watermark and then set text Font, Style, Color, Alignment, etc. on the lower part of Text Watermark panel.
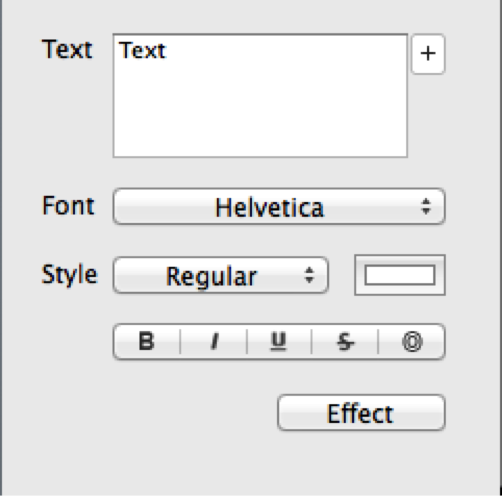
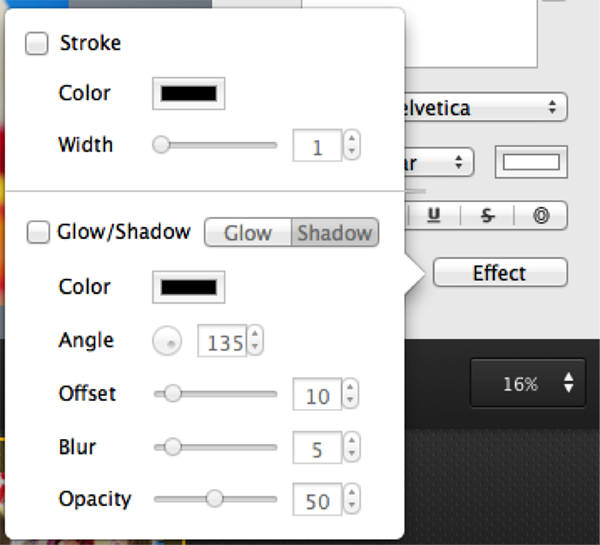
Click Effect to set Stroke, Glow/Shadow for text.
Click Save button  and the export setting window will appear:
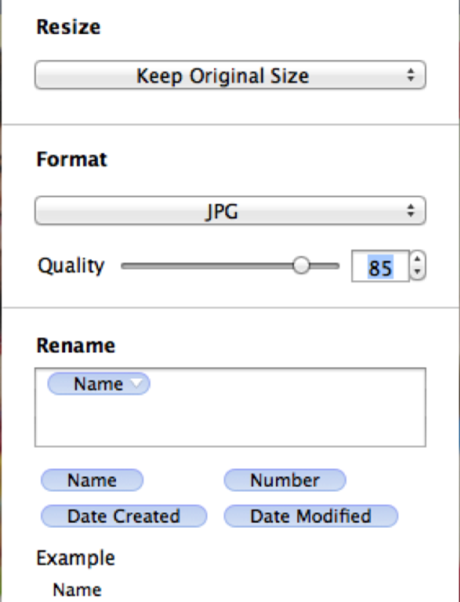
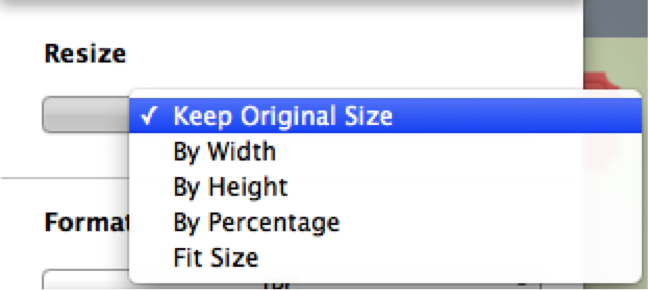
Batch Resize Your PhotosClick Resize combo box to resize your photos by Width, Height, Percentage, or Fit Size.
Batch Convert Your PhotosClick Format combo box to choose a file format that you want to export as.

Batch Rename Your PhotosRename your photos in batch on the lower part of exporting setting window.
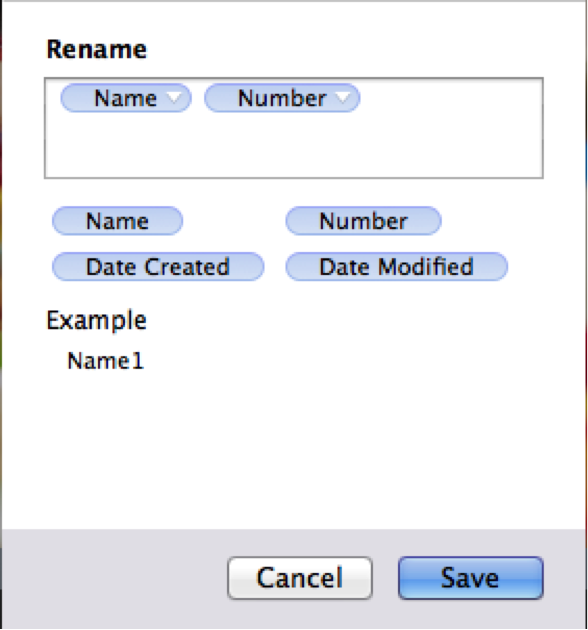
Simply drag and drop wildcard character such as Numbers, Date Created, or Date Modified to the box to rename your photos at will.
Click menu File ->Save Profile…to save your own commonly used watermark as profile for repeated use.
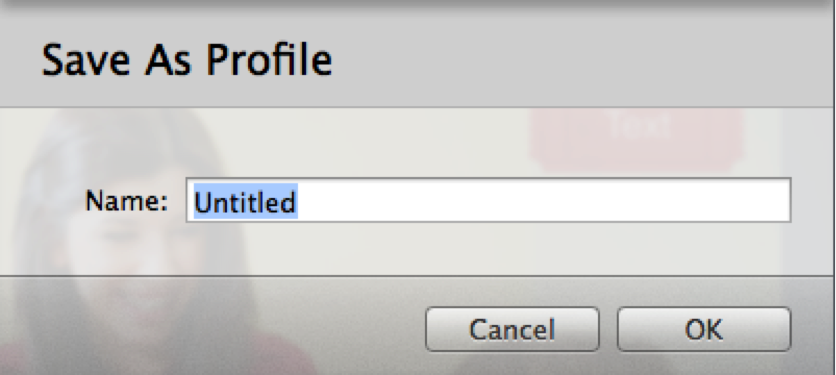
Name your own profile at will and next time you will see it in My Profiles on the profile window.
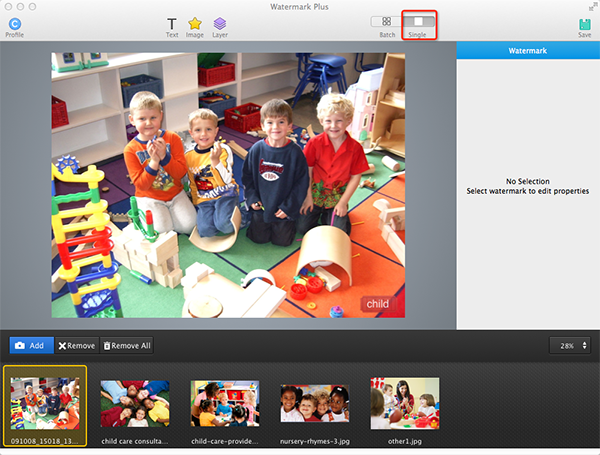
Click  button to switch to Single mode, where you can separately adjust the watermark on each photo with different position, size and rotation.
Click Layer toolbar button  on the top of window to adjust your watermarks at ease.
Click  and
and  to adjust layers for text/image watermarks.
Click  to delete selected watermark.
Select multiple watermarks and then click Group tab on right Watermarks panel to group them and adjust as a whole.
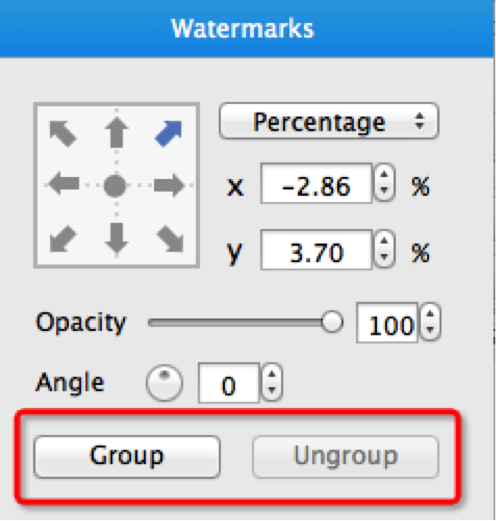
Click Ungroup tab to release the watermarks.
© Copyright 2020 PearlMountain. All Rights Reserved. Online Logo Design