Open VideoGIF and a start panel appears as below.
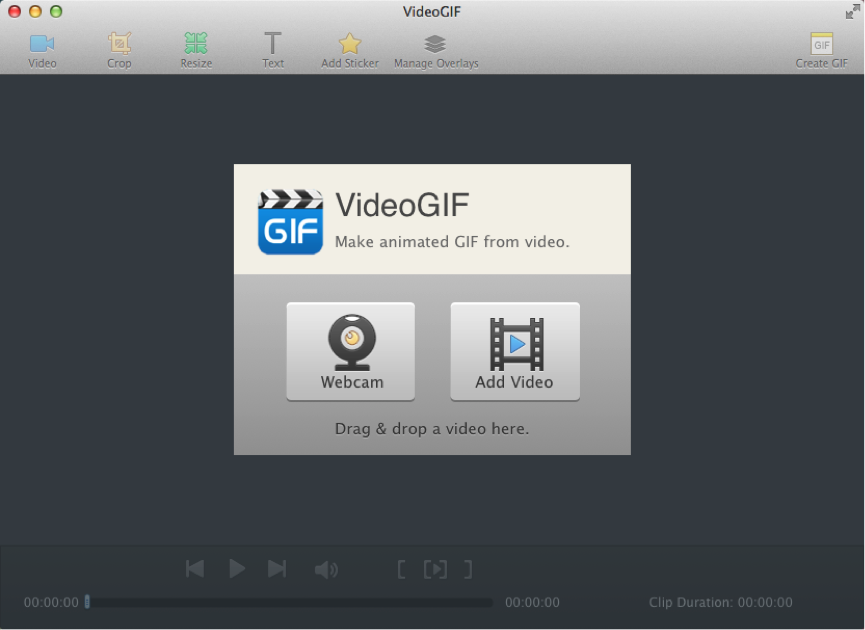
Click Webcam to take a video instantly. When the video is ready, click Use.
Click Add Video to simply add a video from video files.
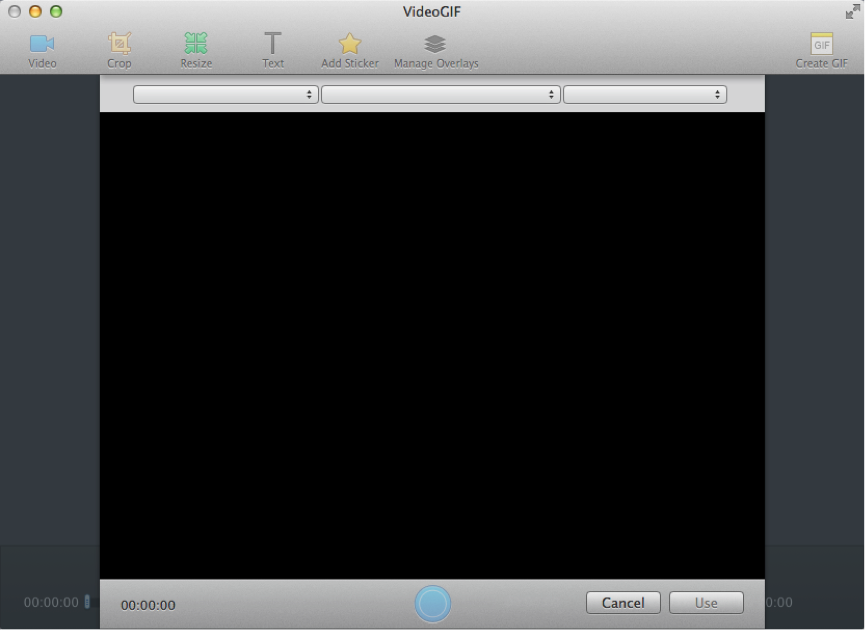
After a video is added, click  to play/pause it. Click
  to go backward by ten steps and click
  to go forward by ten steps. You can click
  to mute/unmute the video sound.

Place the trim button  at a specific time in the video, and click
  to mark it as the start of GIF. Place the trim button at another time behind the first one, and click
  to mark it as the end of GIF. Click
  to separately preview the GIF clip.
Click Crop toolbar button  to crop the GIF in order to display better. You can choose to crop by ratios, click Custom to enter exact pixel, or just drag the handles to crop it manually.
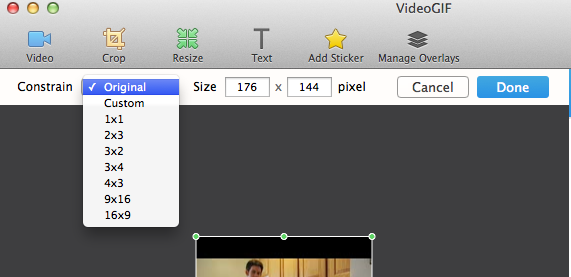
Click Done to exit Crop.
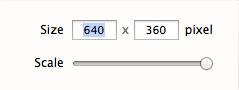
Click Resize toolbar button  to reduce the size of the clip. You can grab the Scale slider to resize it by percent or enter exact pixel to resize it.
Tip:
You can only enter one pixel setting, for the app has to automatically calculate the other since it has to preserve the original aspect ratio.
Click Effect tab to apply various filters to the GIF. Click Original to remove the effect.
Grab corresponding slider to customize Saturation, Hue, Exposure and Contrast, etc.
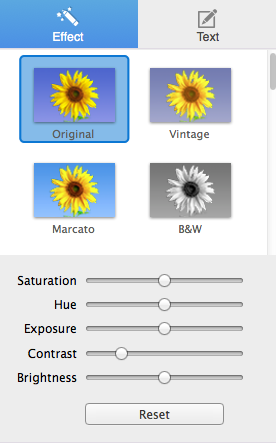
Click Reset to clear all settings of filter/effect, Saturation, Hue, Exposure and Contrast, etc.
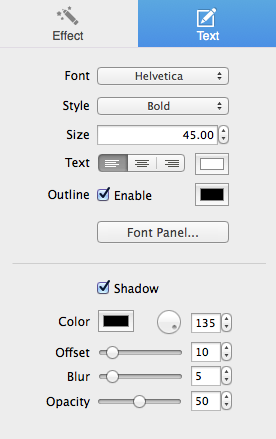
Click Text toolbar button  to insert text. Double click to edit the text. Customize text Font, Style, Size, Outline and Shadow, etc. on the Text tab.
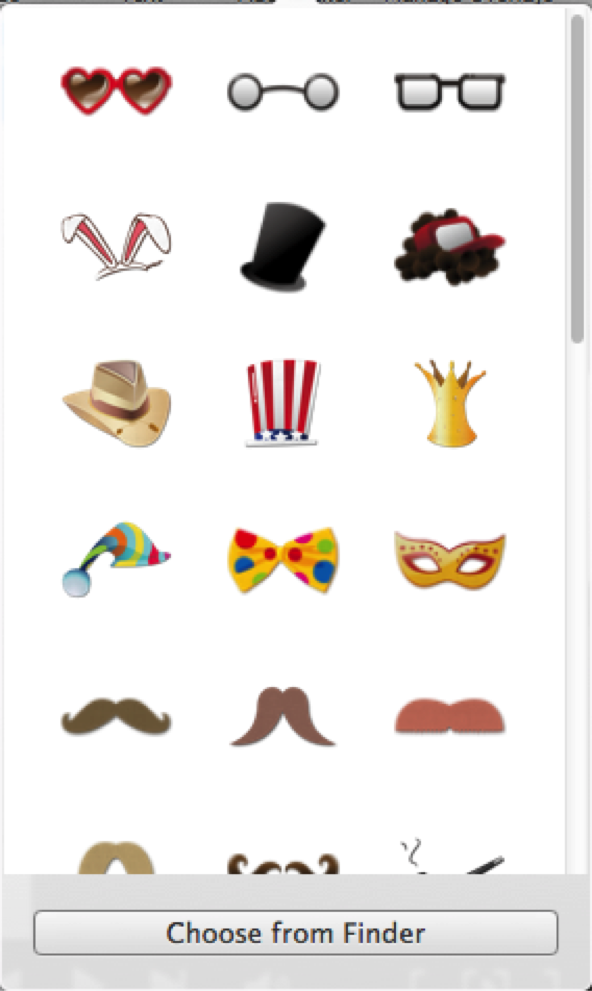
Click Add Sticker toolbar button 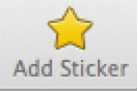 on the top of window to add stickers you like. You can also use your own images as stickers.
Click Manage Overlays toolbar button 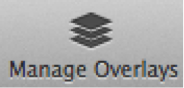 on the top of window to manage overlays for stickers and texts.
Grab and drag the slider to adjust object Opacityor use thestepper control on the right of the slider.

Click  and
and  to adjust layers – bring sticker or textto front or send it to back.
Click  to delete selectedsticker or text.
Click  and
and  to set the start frame & end frame for sticker and text.
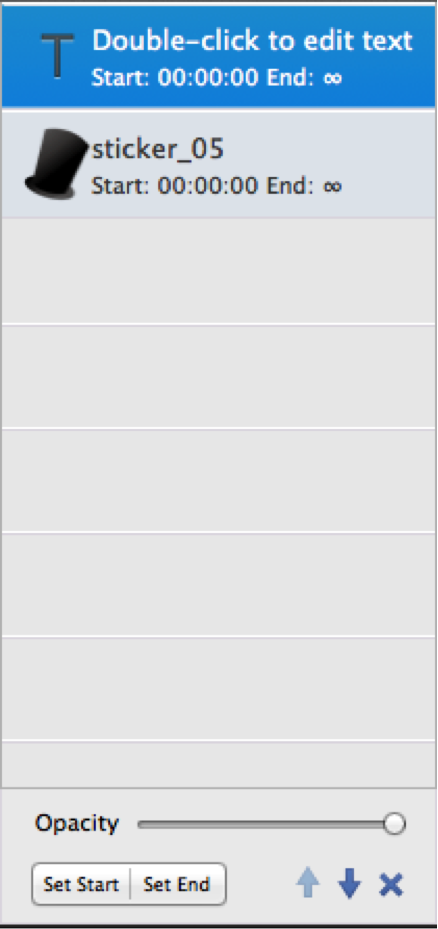
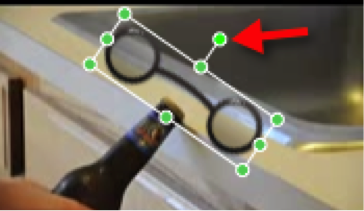
Select a sticker (or text) and the green-framed manipulation handles appear:
Grab the green handle on the top and move it around to rotate the sticker.
Click Create GIF  toolbar button at the right top to customize GIF properties before export it.
On Normal tab, enter a Frame Count to set the number of frames of the GIF.
Set Frame Delay to control the GIF speed. The higher Frame Delay is, the slower the GIF will be animated.
On Auto tab, set Frames Per Second to control the GIF speed.
The higher value you set for Frames Per Second, the longer the creation time is.
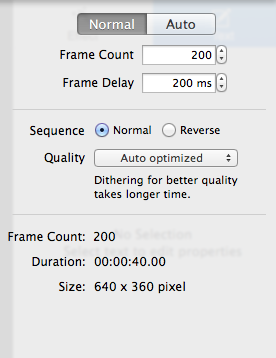
Customize Sequence as Normal or Reverse. Normal makes the GIF show sequentially, and Reverse makes the GIF show reversely.
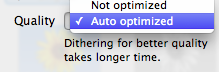
For Quality option, Notoptimized can shorten the creation time. While Auto optimized can optimize the GIF quality, and it requires a longer creation time.
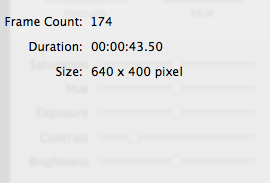
You can view the properties of the GIF immediately on the lower part of this panel, including Frame Count, Duration and Size.

Click Save… to save the GIF in Finder.

Click  to share it via Tumblr.
Click  to share it via E-Mail.
Click  to share it via iMessage (only available for Mac OS X 10.8 or later).
© Copyright PearlMountain. All Rights Reserved. Online Logo Design