Most of us have so many publishing needs – a newsletter for the neighborhood association, a flyer for a church event, a brochure for a travel plan, or a new menu for a family-owned restaurant. However, you may have no idea on how to professionally create these documents. The first priority to solve this problem is that you should know what desktop publishing is. In short, it is the process of using the computer and specific types of software to combine text and graphics to produce documents properly such as newsletters, flyers, brochures, etc. Here you’ve already got the basic concept of desktop publishing, but you’re still not sure which design software is best for you to customize your document.
There is no need to worry about it or spend money on design consultants. Publisher Plus is the most excellent desktop publishing software capable of helping you create awesome printable documents quickly and easily. Here you can free download it and get some simple yet helpful steps on how to customize a professional document in the following article.

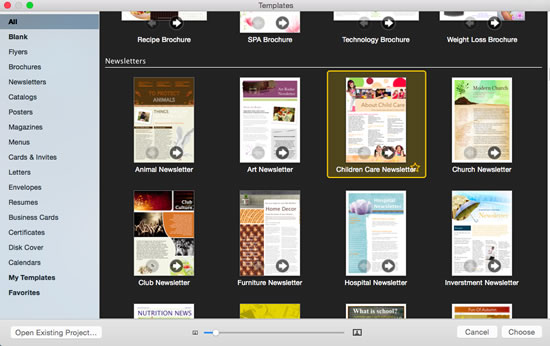
Publisher Plus for Mac is packed with more than 170 templates for any document such as flyers, catalogs, posters, resumes, etc. you want to design. Launch this powerful software and choose your best-loved template to get started.
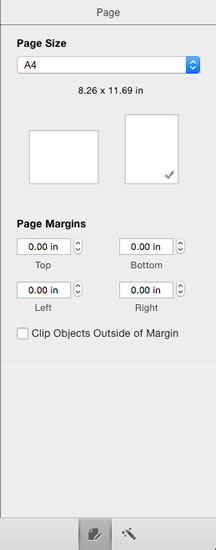
Click  in the bottom-right corner to set Page Size and Page Margins. Here you’re free to choose any page size you need and input Top, Bottom, Left and Right margin properties to adjust your document margins.
This software is a fully-featured and user-friendly desktop publishing software and page layout application, coming with a good set of tools to help you add some objects and decorate them respectively.
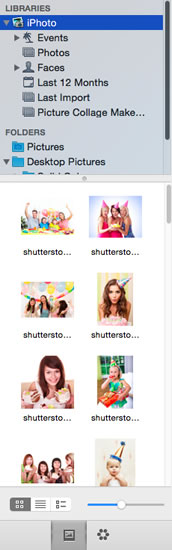
There are many preset pictures on every template. You may need to replace them with your own photos. Simply choose photos you’d like to use from iPhoto in Libraries category or Pictures in Folders category and then drag them onto the existing pictures.
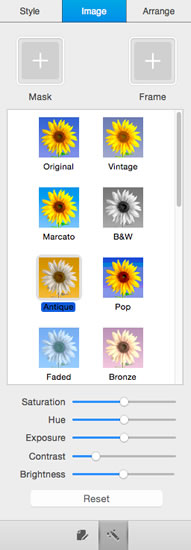
After you’ve added all photos you want to apply, you can select one photo to decorate it by clicking Style, Image and Arrange button. In Style List, you are free to set its Stroke, Shadow and Reflection. If you want to add Mask or Frame onto it, or set its Saturation, Hue, Contrast, etc. you can directly click Image button.
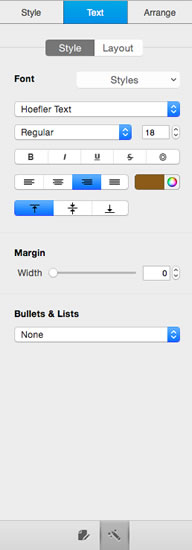
Directly double click the existing editable text boxes to type your own information. Or just click  on the top of window to add a new text box into your document. In addition, free to customize text style, color, size, margins, etc. by clicking Text on the right window.
Once you’ve finished your document design, you can directly click Print button to print it out. Here you can freely make some print settings such as Copies, Pages, Size, etc. to meet all your personal needs.

Whether you are an experienced design user or just a novice, Publisher Plus for Mac will be the best desktop publishing software provided abundant professionally designed templates that help you find inspiration on making any eye-catching document.
© Copyright PearlMountain. All Rights Reserved.