Perhaps you’ve been happily married for years and there are hundreds if not thousands of photos taken during the wedding celebration. They are now in stacks and piles lying on your bookshelf or safely stored somewhere covered with dust. Wondering how to keep these special memories alive? Consider making a wedding scrapbook right now!
A digital wedding scrapbook is an excellent way to keep each and every precious moment of your beautiful wedding day alive. Today there is a very easy digital scrapbooking software for your purpose. With the help of this digital scrapbooking software, you will get everything you need for making a wedding scrapbook, from professionally designed scrapbook kits to photo editing features.
Here you can directly download this digital scrapbooking software on your Mac and follow this article to make your own wedding scrapbook with amazing ease.

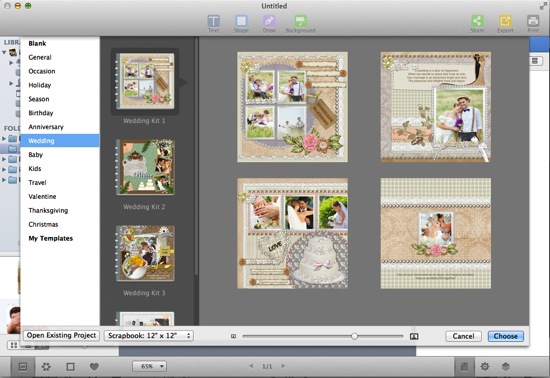
Launch Scrapbook Crafter, and you will see an amazing assortment of perfectly designed scrapbook kits for various occasions and holidays. Choose Wedding category and find your favorite wedding scrapbook kit. Click on it and you will preview every page on the right directly. Open it by double clicking or clicking the Choose button.
After opening the desired scrapbook kit; it comes to add your own wedding photos onto it. You can load your photos from iPhoto or Finder folders. Photos can be the bride in a white wedding celebration dress, bride and groom at the church exchanging rings, bride and groom cutting the wedding cake, a kissing shot, flowers, guests and so on. They are all once in a lifetime after all!
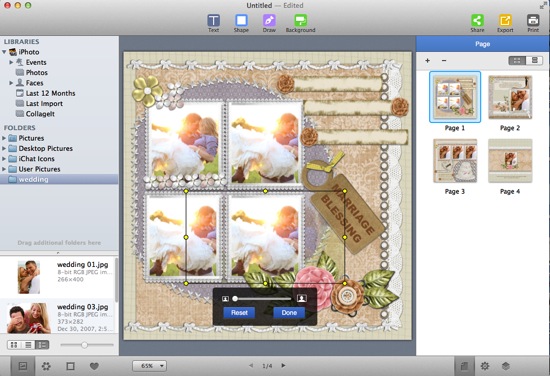
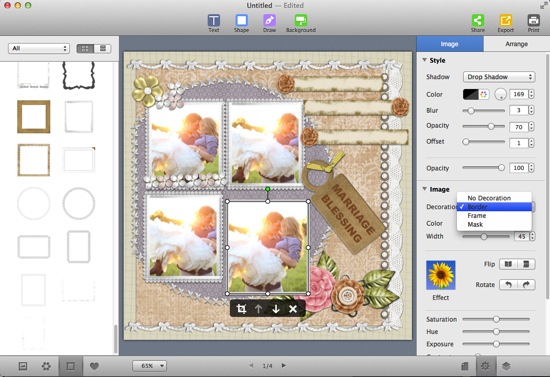
Load your memorable photos on the left photo list and then drag and drop them from the left to the scrapbook kits. You are free to zoom, rotate, flip and mirror photos to make them show perfectly on the template. Also, on the right Image panel, you can freely retouch these photos with photo effects, frames and masks.
There are some text coming up with the template, but you are allowed to change it with what you want to say. Double click on the text box to enter into editing mode and then type over the text with your own words.

If you want to make your text more unique, you are able to format its font, style, color, size, alignment, and shadow, etc., as needed on the right Text panel.
Other delicate elements include the clipart images, shapes, backgrounds and calendars. You are free to make use of them with ease.
See that you add so many elements on your wedding scrapbook; you need to manage their layers to make them show properly on the scrapbook design. Select an object and you will see its layer on the Layer panel. Here you are given the ability to manage layers for different objects.
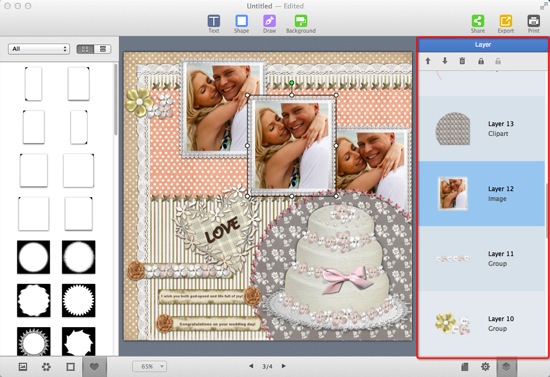
Click the up and down arrow to bring the object to front or send it back.
Click  to delete the layer and also the corresponding object.
Click  to lock any object in scrapbook so that it can’t be moved or deleted. Click
  to unlock it.
You are free to rearrange the layer order by simply dragging and dropping.
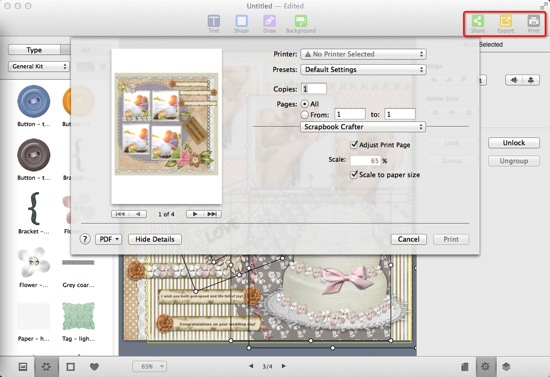
When you get a best look of your wedding scrapbook, you have three options to deal with it. One is to click Export button and save your design as PNG, JPG, or PDF, etc. The second one is to click Print button to directly print your wedding scrapbook out with home printer. The third one is to click Share button to show your creativity with friends or family via Facebook, Twitter, Email and more. Do whatever to suit your needs.
That’s it! Generally, you only need to run the digital scrapbooking software, import the photos, add some additional necessary embellishments, make some designs and a gorgeous wedding scrapbook is ready. Just use Scrapbook Crafter to turn your dreams into reality!
© Copyright 2020 PearlMountain. All Rights Reserved.