Just because the Christmas holiday has slipped by does not mean card-sending season has ended. With Spring is coming, many special events like Easter, Mother's Day, Father's Day, and Graduations are also on the horizon. So it’s never too early to think about new gift ideas for family and friends.
Whatever the occasion, giving a custom greeting card will never be out of fashion and is more meaningful to the recipient and just as attractive as any store-bought card gift! It doesn't matter if the occasion is a birthday, anniversary, Christmas, Valentine's Day, or Mother's Day. An easy yet powerful greeting card maker will deliver everything you need. Discover how to make free custom greeting cards for important dates all year round with the below card-making guide!

Launch Picture Collage Maker for Mac and it automatically shows you a list of templates. Start making custom greeting cards today with these free printable templates under Greeting Card category.
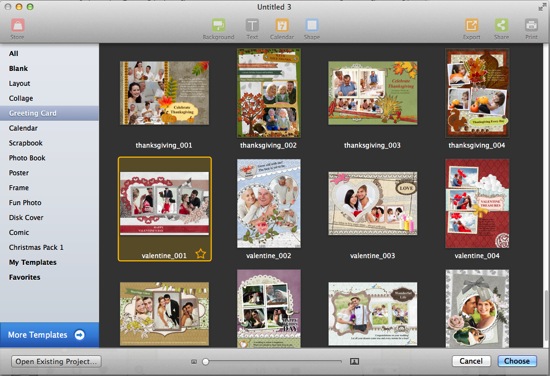
Scroll down to see all the greeting card templates and double click to select one that you most like. These templates are all customizable for any event.
Once you’ve chose the greeting card template you need, start to add your own photos to fill all the frames on the template. You are given easy access to iPhoto, Aperture and local folders on your Mac. Also, you can directly drag and drop any folder under FOLDERS on the left.
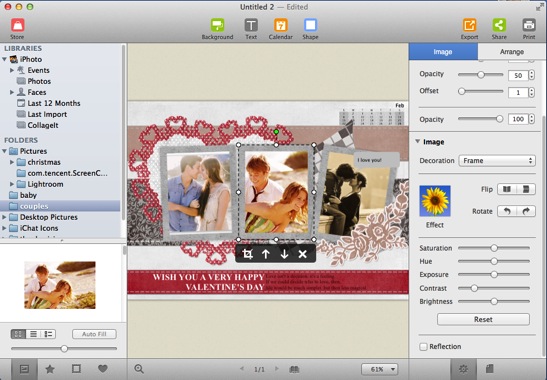
In order to perfectly show photos on the card, double click to crop photos to show the exact part you like. You can also drag the handles to rotate, and resize photos for best look.
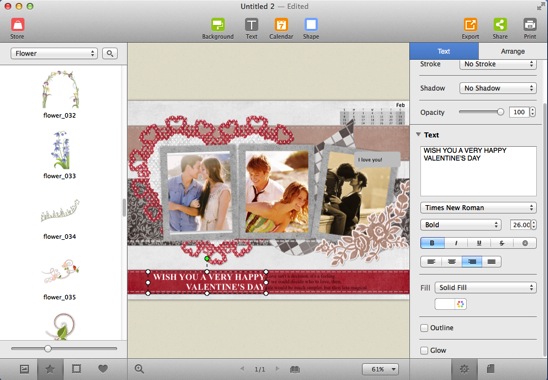
When you make greeting cards, you should always add some personal messages. Text may come up with the template, but you can change it to say anything that you like. Simply click on the template's text, and start typing your own personalized message in text box on the right Text panel, where you can also change the text formatting. Options include font size, style, color, fill, outline, glow, etc.
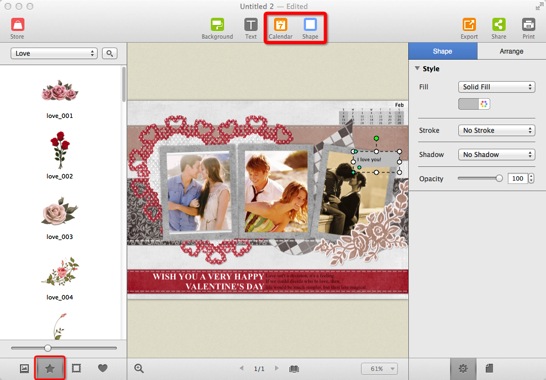
To make a more unique and stylish greeting card, you can add delicate clipart, calendar and shape within this greeting card maker to your liking.
Besides, you can add a frames, apply masks, customize border, and more to beautify photos on the right Image panel. There is no limitation for making a custom greeting card in your way.
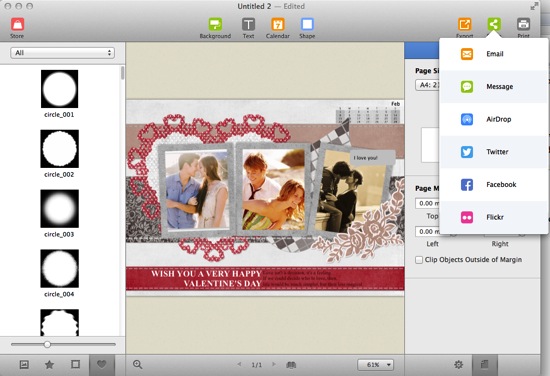
When you are satisfied with your greeting card you can choose to Print or Share it. When it comes to print your custom greeting card, don't forget that you have option to have a final preview and make some print settings. If you choose Share, you have wide choices to share via popular social networks.
After you learn how to make custom greeting cards, you can express your heartfelt sentiments in style. Friends and family will always be touched by the thought and effort that a custom greeting card delivers. Try out this simple greeting card maker today!
© Copyright PearlMountain. All Rights Reserved.