Comic books are pretty popular all around the world, which tell bold and exciting stories with a combination of colorful characters, speech bubbles and bright colors. Creating a personalized and funny comic book is a great dream that many young authors and illustrators want to make it come true. However, it can be done regardless of age or skill level. All you need is a powerful comic book maker that enables you to make your own unique comic book, illustrating with pictures of your own families or your friends and depicting real life stories in an interesting way.
After surfing on Internet, you may be still not sure of what kind of comic maker is the best. Here, you can choose Picture Collage Maker as your top pick to meet all your needs. It is designed to help you make a wonderful comic book and take your stories to a whole new level through the form of animation. Now, check the following guide on how to make a comic book step by step.

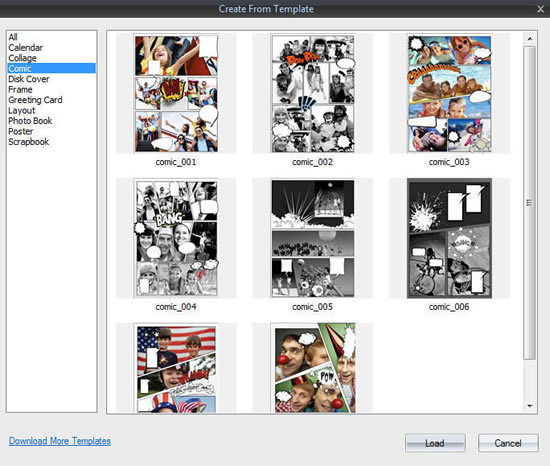
Selecting a unique style template is the beginning of your successful photo design. There are many free and delicate templates in Picture Collage Maker. Launch the software and double click Create From Template to get an access to your favorite comic book template .
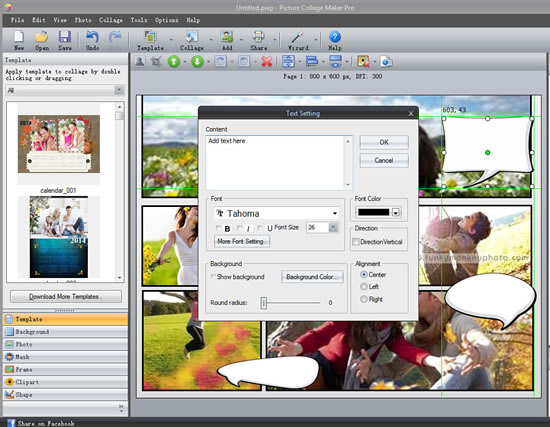
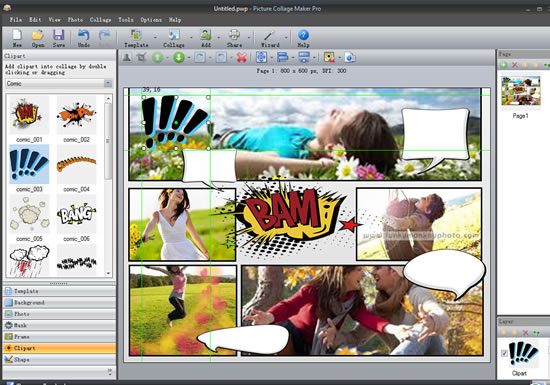
Brainstorm your story characters and plot lines first. Next click Add →Add Text button on top of window to type simple dialogue and then move them into each pre-designed speech bubble accordingly. To make your story more attractive, you can set the font size and bright color at will.
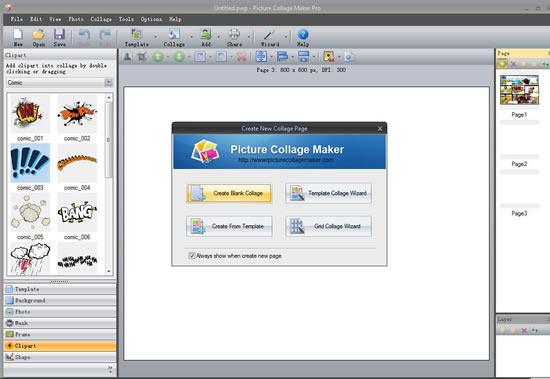
Note: A whole story can’t be finished just in one page. What you need to do is that add some new pages to write your story in coherent lines. Click Add Page on the right window and then you can repeat the step 1 and step 2 to finish your entire story.
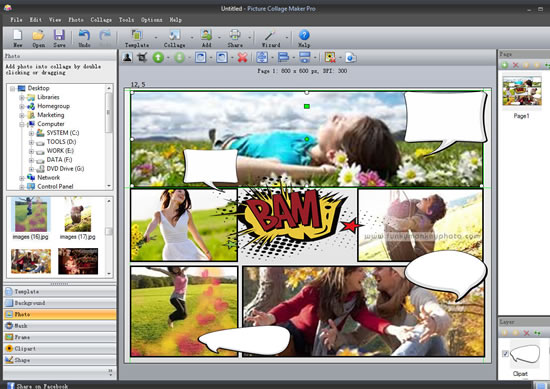
One important thing to note here is that photos should be added in the plot order according to your story. Directly click Photo button on left to add photos related to your story. In addition, you can click Photo pane on top of window or directly click related icon button on top of the edit area to add shadow, set layer, crop, etc.
Included in this software are abundant of cliparts, allowing you to create your comic book in a vivid way. Click Clipart button on left and then double click or directly drag your favorite comic type clipart to depict stories. Besides, a good option for you is that you can resize it freely.
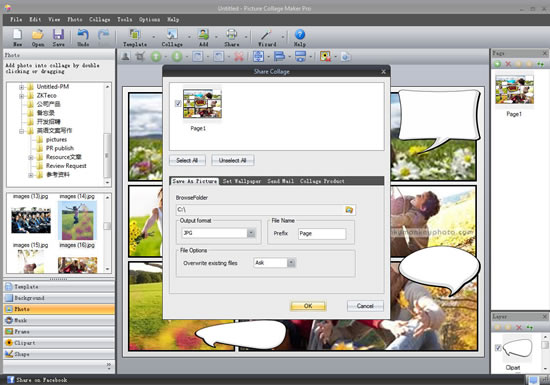
Click File → Save Collage as Picture button on top and then you can save it as JPG, PNG, BMP, GIF and TIF format for permanent use.
Creating a personalized comic book is no longer a tedious and difficult task with the use of this simple yet powerful comic book maker. Whether you want to create a superhero story or your own life story, it will let you make your masterpiece easier than ever.
© Copyright 2020 PearlMountain. All Rights Reserved.